I decided not to bead blast the engine casings, and to paint them instead using POR-15's engine paining kit. Here's how it went:
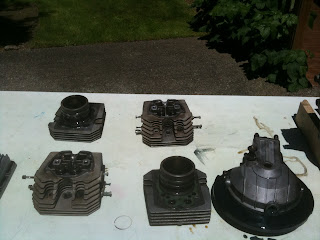
Start off with the engine casings. They had already been pressure washed when the engine was in a single piece, but now we're going for the deep clean. Here's the initial condition (click to see larger):
There's no rust, but the alloy has a dirty finish and looks tired:
The first step is a clean with a regular engine cleaner/degreaser:
You then splay on a mixture of POR-15's Marine Clean and hot water. Spray it on, leave it, scrub it with brushes and then rinse off:
Repeat this step until the engine is free of all grime. You then spray on the POR-15 Prep-and-Ready onto the clean surface, leave it about 20 minutes and wash it off. This roughens the surface and leaves a deposit behind that the POR-15 adheres to:
It actually makes the surfaces look worse! But it's ready for the POR-15 itself once everything is bone dry. This comes in a tiny tin, and I thought it would never be enough. But it goes on very easily with a 1" and 1/2" brush, and there was plenty left, probably more than half was left. The finish is great, a nice glossy topcoat on top of the clean grey metal:
Some people like to leave it with just the POR-15. (Someone I know used two coats of POR-15 and then a clear coat to protect it from UV, which can make it go yellow. It looks great!) But I decided to use the Aluminum-colored Engine Enamel.
Wait until the POR-15 is dry, but still offers some drag to your finger when you lightly stroke your finger across a surface. Then simply paint on the engine enamel, using as little as possible to cover completely. Leave it to harden for about a week (I left it for two), then lightly scuff and also rub out any runs with a fine sandpaper. Add a second coat. End results were spectacular, IMHO:
I used POR-15's Chevy Orange engine enamel on the cylinder heads:
Overall, I'm really pleased with the POR-15 engine painting hit. It's taken several hours over a period of about a month, but was pretty straight forward. I think the engine casings look great, and can't wait to start putting it all back together.


